Prologue
In the coming weeks, the series Hacking Prowork will show developers how to build interesting applications on top of Prowork using the API.
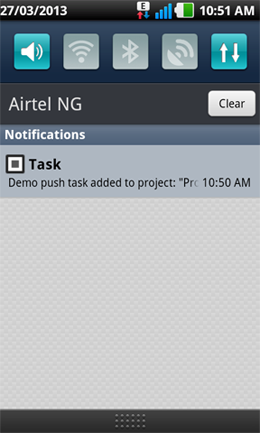
We’ll be starting with a simple android app that displays your Prowork notifications in the status bar. The complete source code is available here. You can download the application from https://play.google.com/store/apps/details?id=me.prowork
Architecture
We will be using Prowork’s push API to push notifications from Prowork to the app. This we will achieve using Google Cloud Messaging for Android (GCM).
The architecture goes like this:
- Our app registers with GCM and gets a registration id.
- With this id, we register for Prowork’s push (we need the id to be able to send messages back to the app)
- Prowork’s push core parameters are user’s id and the url notifications will be sent to. So we need a middle layer (let’s call it server) that will serve as a proxy and map the user id to registration id. It is also this server that Prowork pushes notifications to.
- When there is a new notification, Prowork sends it to our server (middle layer). Our server processes the notification data, prepares the message and sends it to the GCM server using the mapped registration id. GCM then sends the message to the user’s phone. (It knows the specific user’s phone via the registration id).
- Phone gets message and tells our app it has a new message. Our app then displays it in the status bar. You can extend this to even display the notification within the app as well.
It all sounds cool in theory. Let’s get to work. But first, what do we need?
What do we need?
- We need to register our app at prowork.me/apps and get an api key. This is one of the required parameters for the push api.
- We need to register our app at Google as well so we can get a sender id for registering our app with GCM and an auth key for sending notification message to GCM. Details of how to here.
The app
I won’t go into the full details of building the Android app here. That will take over 3 long blog posts. I will however explain some of the core code snippets. I really recommend you read the GCM docs to have the full idea. The source code of the android app is available here. [If there are tricky parts you don’t get, hit me up.]
The first part of the app is logging the user in. What we do is simply get the user’s email and password and post this to the login api method. Prowork sends back a token, user_id, name among other parameters.
static final String API_SERVER = "http://api.prowork.me/";
...

static void login (final String email, final String password, ResponseCallback callback) {
  String serverUrl = API_SERVER + "session/get";
  Map<String, String> params = new HashMap<String, String>();
  params.put("api_key", API_KEY);
  params.put("email", email);
  params.put("password", password);
  try {
    post(serverUrl, params, callback);
  } catch (IOException e) {
    //Log.d("URL error", e.getMessage());
    callback.handleResponse(0, e.getMessage());
  }
}

...
private static void post(String endpoint, Map<String, String> params, ResponseCallback callback)
    throws IOException {
  URL url = new URL(endpoint);
  StringBuilder bodyBuilder = new StringBuilder();
  Iterator<Entry<String, String>> iterator = params.entrySet().iterator();

  // constructs the POST body using the parameters
  while (iterator.hasNext()) {
    Entry<String, String> param = iterator.next();
    bodyBuilder.append(param.getKey()).append('=')
        .append(param.getValue());
    if (iterator.hasNext()) {
      bodyBuilder.append('&');
    }
  }
  String body = bodyBuilder.toString();

  byte[] bytes = body.getBytes();
  HttpURLConnection conn = null;
  try {
    conn = (HttpURLConnection) url.openConnection();
    conn.setDoOutput(true);
    conn.setUseCaches(false);
    conn.setFixedLengthStreamingMode(bytes.length);
    conn.setRequestMethod("POST");
    conn.setRequestProperty("Content-Type",
        "application/x-www-form-urlencoded;charset=UTF-8");

    // post the request
    OutputStream out = conn.getOutputStream();
    out.write(bytes);
    out.close();

    // Read response
    InputStream is = conn.getInputStream();
    BufferedReader rd = new BufferedReader(new InputStreamReader(is));
    String line;
    StringBuffer response = new StringBuffer();
    while((line = rd.readLine()) != null) {
      response.append(line);
    }
    rd.close();

    int status = conn.getResponseCode();

    // Send response to callback
    callback.handleResponse(status, response.toString());

  } finally {
    if (conn != null) {
      conn.disconnect();
    }
  }
}

ServerUtilities.login(email, password, new ResponseCallback() {
  @Override
  public void handleResponse(final int responseCode, final String data) {
        ...

        try {
          JSONObject json = new JSONObject(data);

          // Successful?
          if (responseCode == 200) {

            // Get name, token and userid
            name = json.getString("name");
            token = json.getString("token");
            userId = json.getInt("user_id");

            // Register the app and listen to incoming messages
          }
          else {
            error = json.getString("error");
          }
        } catch (JSONException e) {
          error = getString(R.string.internal_error);
        }

        ...

      }
    });
  }
});
Now that we are logged in, the GCM registration part is simple. That is easily handled via the GCM library
// SENDER_ID: Your Google sender id
GCMRegistrar.register(this, SENDER_ID);
This however simply registers the app with Google alone. When it is done, we want to register the app on our own server too. How we do this is to extend the GCM library’s GCMBaseIntentService and handle onRegistered
@Override
protected void onRegistered(Context context, String registrationId) {
  // Log.i(TAG, "Device registered: regId = " + registrationId);
  ServerUtilities.register(context, registrationId);
}

...

// ServerUtilities

static final String SERVER_URL = "http://url_of_our_proxy_server/";
...

static boolean register(final Context context, final String regId) {
  String serverUrl = SERVER_URL + "register";
  Map<String, String> params = new HashMap<String, String>();
  params.put("reg_id", regId);
  params.put("token", TOKEN); // token from login
  long backoff = BACKOFF_MILLI_SECONDS + random.nextInt(1000);

  // Register with server. Retry a couple of times if failed
  for (int i = 1; i <= MAX_ATTEMPTS; i++) {
    try {
      post(serverUrl, params);
      GCMRegistrar.setRegisteredOnServer(context, true);

      return true;
    } catch (IOException e) {
      if (i == MAX_ATTEMPTS) {
        break;
      }
      try {
        Thread.sleep(backoff);
      } catch (InterruptedException e1) {
        // Activity finished before we complete - exit.
        Thread.currentThread().interrupt();
        return false;
      }

      // increase backoff exponentially
      backoff *= 2;
    }
  }
  return false;
}
So once the app is registered with GCM, it sends the registration id and token returned from login to the [proxy] server. The token will be used to confirm the current authenticated user and map the registration id to the user’s id on the server. The server will take it from there - register for Prowork’s push and be set to receive incoming push notifications from Prowork. But we will stop here now.
In the next post of this series we will look at the middle layer server. You can use the time to check out GCM and explore the full app source. You can as well check out the source code of the server already. Do try your hands on building cool stuff on top of Prowork via the API and be sure to let us know.